Sometimes you need to draw a circle in your app. Sometimes more than a circle but here we will start with a circle. I will go through the mistakes I keep making to future proof myself when I need to draw them circles. The code is available at https://github.com/sunwicked/draw-dragon
Step 1: Start a new project in Android Studio
Step 2: Create a class CircleView which extends View
Get our brush ready for drawing a circle
Paint paint;

public CircleView(Context context) {
    super(context);
    init(context);
}
.....

private void init(Context context) {
    paint = new Paint();
    paint.setColor(ContextCompat.getColor(context, R.color.colorAccent));
    paint.setStyle(Paint.Style.FILL);
}
Step 3: Now is the time to draw our circle.How do we draw a circle? We ask the canvas to do it for us. Let’s ask it nicely in onDraw() method.
@Override
protected void onDraw(Canvas canvas) {
    super.onDraw(canvas);
    canvas.drawCircle(50, 50, 20, paint);
}
But how do we know we are doing it right. To get around we will add the view in a layout first and see. Let’s do that in step 4
Step 4 : Adding the circle in xml file
       <app.circle.com.circle.CircleView
        android:layout_width="wrap_content"
        android:layout_height="wrap_content"
        app:layout_constraintBottom_toBottomOf="parent"
        app:layout_constraintLeft_toLeftOf="parent"
        app:layout_constraintRight_toRightOf="parent"
        app:layout_constraintTop_toTopOf="parent" />
and voila! It is rendered
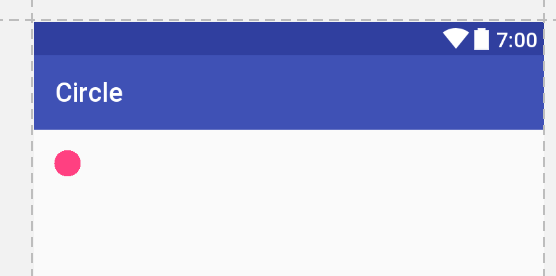
Do you know why it is rendered on the left top side? Because we gave x and y coordinates as (50,50) and canvas (0,0) starts from left top.
Let’s see how much the space the view is actually occupying . Let’s add a background colour to the view.
android:background="@color/colorPrimaryDark"
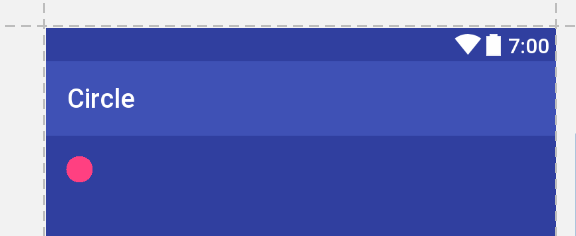
It is actually occupying the whole screen and drawing the circle at one point. A bit greedy. Let’s try to fix this.
Step 5 : We can give specific height and width values to the view.
android:layout_width="50dp"
android:layout_height="50dp"

Step 6 : Let’s try to add more circles. We can add more views to xml but what’s the fun in that. Let’s add circle wherever the user taps.
First we add a touch listener to parent layout.
relativeLayout.setOnTouchListener(new View.OnTouchListener() {
    @Override
    public boolean onTouch(View view, MotionEvent motionEvent) {

        switch (motionEvent.getAction()) {

            case MotionEvent.ACTION_DOWN:
                addCircle(motionEvent);
                break;
            case MotionEvent.ACTION_MOVE:
                break;
            case MotionEvent.ACTION_UP:
        }
        return true;
    }
});
and then whenever the user touches the screen we fire a method to add a circle.
private void addCircle(MotionEvent motionEvent) {

    CircleView circleView = new CircleView(this);
    relativeLayout.addView(circleView);
}
Looks good but when you run it you find new circles are not there.
So what is happening here? All the new views are added at the same location, lets set different locations for the new views.
private void addCircle(MotionEvent motionEvent) {
CircleView circleView = new CircleView(this);
RelativeLayout.LayoutParams params = new RelativeLayout.LayoutParams(RelativeLayout.LayoutParams.WRAP_CONTENT,
RelativeLayout.LayoutParams.WRAP_CONTENT);
params.leftMargin = (int) motionEvent.getX();
params.topMargin = (int) motionEvent.getY();
relativeLayout.addView(circleView, params);
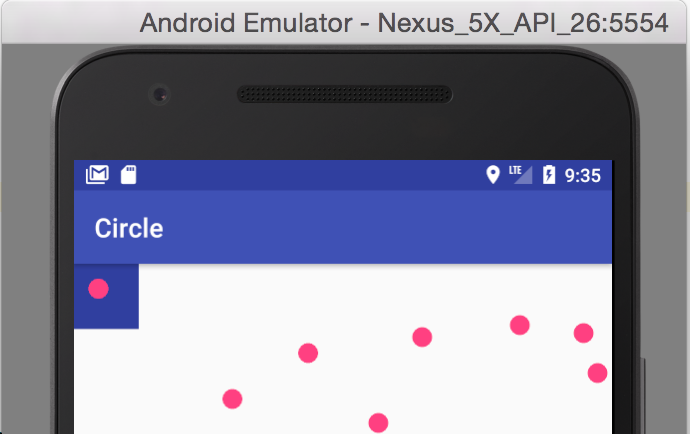
}Look Ma! I made Circles :) So what is happening here. We added a margin to top and left of circle view, hence the views are added from the point where we tap.
Step 7: Remember how the view we added in xml was taking the entire space. We still have that issue. Because last time we explicitly told the dimensions via xml. Let’s fill the canvas and see.
@Override
protected void onDraw(Canvas canvas) {
    super.onDraw(canvas);
    canvas.drawCircle(50, 50, 20, paint);
    canvas.drawColor(paint.getColor());
}
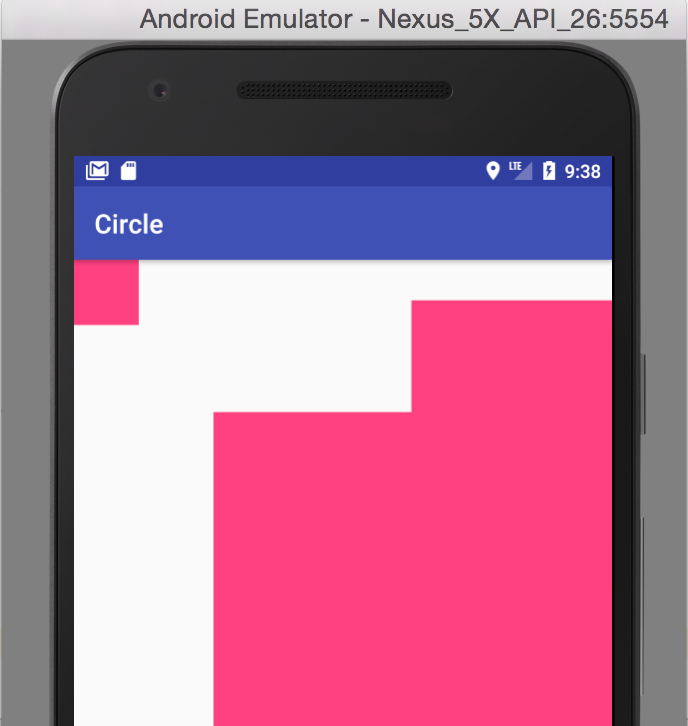
These rectangles start from the tap point on the screen. Position is correct but we still need to take care of space which the view is taking. We would add the size, we want the circle view to be just like we did in the xml.
private void addCircle(MotionEvent motionEvent) {

    CircleView circleView = new CircleView(this);

    RelativeLayout.LayoutParams params = new RelativeLayout.LayoutParams(100,100);
    params.leftMargin = (int) motionEvent.getX();
    params.topMargin = (int) motionEvent.getY();

    relativeLayout.addView(circleView, params);
}
Notice the width and height parameters now and now when you run it again. Fixed it!
Step 8: Plot twist : What if we need only one circle and we need to move it around with user’s finger. Ahh project requirements! You son of a beach.
Now we would stop adding more circles. Let’s go back to one circle in xml. Now we need to get to know when user taps on the circle and when he moves it and when he releases it. We will start with drawing our circle to the point user taps.
relativeLayout.setOnTouchListener(new View.OnTouchListener() {
        @Override
        public boolean onTouch(View view, MotionEvent motionEvent) {

            switch (motionEvent.getAction()) {

                case MotionEvent.ACTION_DOWN:
                   moveCircle((int)motionEvent.getX(),(int)motionEvent.getY());
                    break;
                case MotionEvent.ACTION_MOVE:
                    break;
                case MotionEvent.ACTION_UP:
            }
            return false;
        }
    });
}

private void moveCircle(int x, int y) {

    RelativeLayout.LayoutParams params = new RelativeLayout.LayoutParams(100,100);
    params.leftMargin = x;
    params.topMargin = y;
    circle.setLayoutParams(params);
}
Now we need to move the circle with drag. Let’s just call the same method from ACTION_MOVE. What do you get? A moving circle? Nope. It just appears at the point we tap not moves with the drag.
Notice that we are returning false. Henceforth we are not getting the further actions after the first ACTION_DOWN. The boolean value is an indicator of whether we are consuming the event or not. Let’s make the changes.
relativeLayout.setOnTouchListener(new View.OnTouchListener() {
        @Override
        public boolean onTouch(View view, MotionEvent motionEvent) {

            switch (motionEvent.getAction()) {

                case MotionEvent.ACTION_DOWN:
                   moveCircle((int)motionEvent.getX(),(int)motionEvent.getY());
                    break;
                case MotionEvent.ACTION_MOVE:
                    break;
                case MotionEvent.ACTION_UP:
            }
            return false;
        }
    });
}

private void moveCircle(int x, int y) {

    RelativeLayout.LayoutParams params = new RelativeLayout.LayoutParams(100,100);
    params.leftMargin = x;
    params.topMargin = y;
    circle.setLayoutParams(params);
}
So now we can replace the circle with any view we want. Did someone say dragons?
This wraps up the first episode. Next episode we will try to draw something more than a circle and put in some text also for fun.
Imagine a non-circle + text = mind blown.
If you liked the article do hit the like button. Please point out at them mistakes too.
Au revoir!
